Are, well, exactly what they sound like. The cast made a bunch of these for themselves so they can rehearse in mask, getting used to the feel of things, while Katherine and I make the masks for performance. They are simple masks and easy to make, and they would serve pretty much the same function as those cheap, plastic masks you buy at the craft store, with the added bonus that it’s made to fit your face specifically, and so are very comfortable.
- Materials
- Preparation
- Step 1 – Lubricate Face
- Step 2 – Cover Eyes and Edge Face
- Step 3 – Lay Nose Strip
- Step 4 – Cover Face
- Step 5 – Layer Thin Spots
- Step 6 – Wait to Dry
- Final Steps
Materials
You will need…
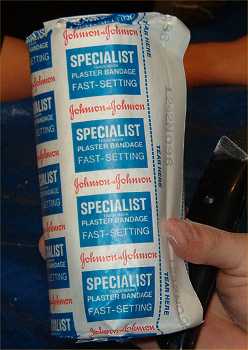
– Cast bandages (as seen below)
– Warm water
– A tarp or something similar to minimize messiness
– Scissors and/or Exacto knives
– Vasoline
– Paper towels
– White Acrylic Gesso
– A cheap housepainting brush
Here comes the fun part. You’ll need two people to get this done. The process itself doesn’t take terribly long, but it does get messy, so make sure you prepare appropriately. Once we get into the mask-making, your partner will be doing the work.
Preparation

– You will need to cut the bandages into strips. The bandages normally come in a large roll, so if you can cut the entire roll in half with an Exacto knife….insta-strips!
– Make sure you have a small bucket or bowl of warm water, this will be for dipping the bandage strips and paper towels in.
– If you have a tarp, it’s helpful to lay it out and do the mask-making on top. It makes clean-up much easier.
Step 1 – Lubricate Face
Lather your face with vasoline. It’s nasty and gooey, but it will help when it’s time for the mask to come off. Pay particular attention to facial hair (If the plaster sticks to facial hair without any lubrication, it will pull it out, much to the painful chagrin of the masked person).
Step 2 – Cover Eyes and Edge Face The bulk of these steps are for the partner, who will do the actual “mask making” so to speak. – Fold up little paper towel squares, dip them in the water, and cover your partner’s eyes. – Then, take long sheets of paper towel and fold them in half. – Dip half of the folded paper towel into water lengthwise, then apply to the edge of your partner’s face and smooth against their skin. Make sure all of their hairlines are covered. Repeat until you have the entire border of the face covered. |
Step 3 – Lay Nose Strip

– Take a long strip of bandage, and dip it once in the warm water. Mush it about with your fingers, and you’ll see the plaster start to spread around.
– Fold that strip in half, then lay it down the center of your partner’s face, over their nose and mouth.
– At this point, you can start dipping strips, mushing them about, and applying them to your partner’s face vertically and horizontally. Make sure you smooth and flatten the bandages against your partner’s face as best you can.
Step 4 – Cover Face – Start covering your partner’s entire face with this method. Be sure to leave the nose open, so they can breath. Cover up the mouth, but make sure they don’t have any last words first ^_^ – Also, it is very cruel to try and make your partner laugh in this state, don’t be mean! 😛 |
Step 5 – Layer Thin Spots

– Cover the whole face all the way down to the chin.
– After you have the face covered, go back over with 1 or two more layers of bandages.
– Have your partner feel their face and indicate any thin spots which you can cover up.
Step 6 – Wait to Dry

When you are finished, help your partner stand up, and seat them someplace comfortable while they wait for the mask to dry.
– It takes about 15 minutes for the plaster to dry, so be patient.
Final Steps

– After the mask has set, it will be hard to the touch.
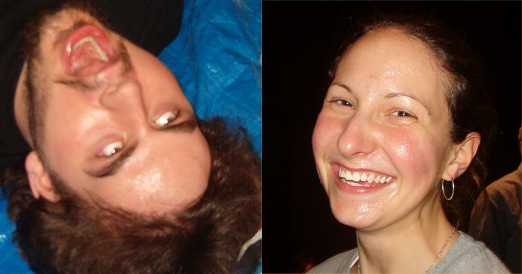
– Have your partner sit up and lean their head over, using gravity to gently slide the mask off. (having them scrinch their face about will help detach it).
– Voila! The first stage is complete! Use this time to pull off the paper towels and little eyepatches, they should come out easily since they are still wet.
– Set your mask someplace safe to give it an overnight dry. And wash your face! It’ll have plaster bits and vasoline on it, icky!
Finishing Up…
– The next day, paint your mask with a coat or two of white Acrylic Gesso to seal it, and set it to dry.
– When it has dried, you may take an exacto knife to your mask and alter it as necessary. Cut out eye holes, cut the whole thing into a half-mask, whatever you need.
– You are finished! You may now proceed to anything you wish to use your rehearsal mask for. Enjoy!